Storage Settings
Overview
The Storage Settings page is used to configure external file storage for your platform. This is where you connect your application to a storage provider so that all media files such as images, videos, and documents are stored securely and persistently.
The platform uses object storage (such as DigitalOcean Spaces) to handle all file uploads and media generated within the system.
Why Storage Configuration Is Required
Storage configuration is mandatory for proper platform operation. Without an external storage setup, media files generated within the platform will not be permanently stored.
This includes files such as:
- Images sent or received through messaging channels
- Videos and media shared within conversations
- Files uploaded by users or generated by the system
If storage is not configured, these files may be lost during platform updates, deployments, or system resets.
Default Storage Approach
The platform is designed to work with cloud-based object storage providers. By default, a cost-effective solution such as DigitalOcean Spaces can be used, which provides reliable storage with predictable pricing.
This allows you to store and serve media efficiently without managing your own infrastructure.
How Storage Works
Once configured, all media files are automatically uploaded to the connected storage provider. The platform then retrieves and serves these files when needed, ensuring that all user interactions involving media remain intact.
This setup ensures:
- persistent file storage
- reliable media access
- scalability as your usage grows
Configuration Requirements
To configure storage for your platform, you need to set up a DigitalOcean Spaces bucket and generate the required credentials.
Follow the steps below:
Step 1: Create a Storage Space
Go to DigitalOcean and create a new Space (bucket). While creating the space:
- choose a region (this becomes part of your endpoint URL)
- give a unique name to your space
- optionally enable CDN during creation
Step 2: Create Access Keys
To allow your platform to connect to the storage, you need to generate access credentials:
- go to API → Spaces Keys
- click Generate New Key
- copy the Access Key and Secret Key
📘 Guide: https://docs.digitalocean.com/products/spaces/how-to/manage-access/
You can control who can access your files by setting bucket permissions.
By default, access is restricted, and permissions can be configured to allow public or private access depending on your use case.
📘 Guide: https://docs.digitalocean.com/products/spaces/how-to/manage-access/
Step 4: Enable CDN (Recommended)
To improve performance and file delivery speed, enable CDN for your Space.
- go to your Space → Settings tab
- find CDN section
- click Enable CDN
Once enabled, your files will be served through a CDN endpoint like:
<space-name>.<region>.cdn.digitaloceanspaces.com
A CDN (Content Delivery Network) URL can be configured to improve performance. This ensures that files are delivered quickly to users regardless of their location, improving overall application speed and user experience.
📘 Guide: https://docs.digitalocean.com/products/spaces/how-to/enable-cdn/
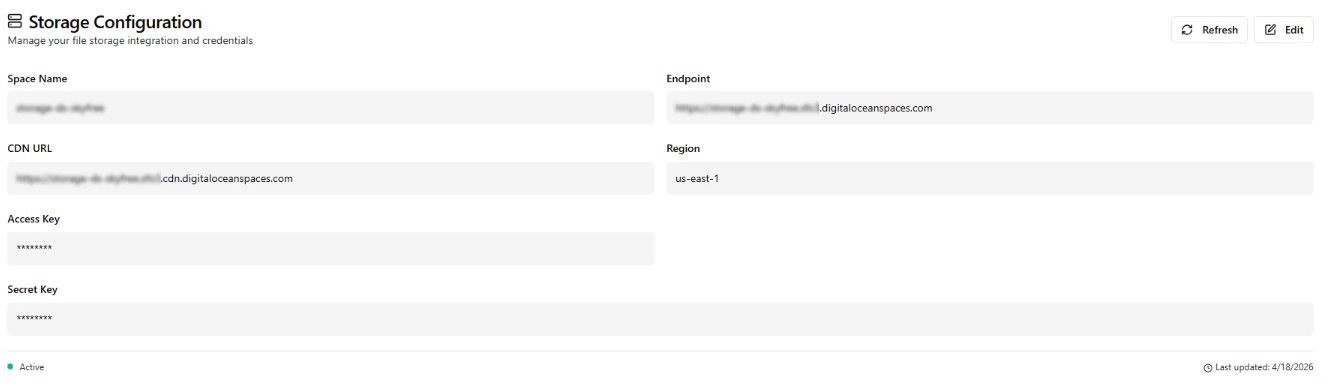
After setup, copy the following values into your platform:
- Space Name (Bucket Name)
- Endpoint URL
- CDN URL
- Region
- Access Key
- Secret Key
These values connect your platform with DigitalOcean storage.
Video Guide
Watch this step-by-step guide to set up DigitalOcean Spaces:
Last modified on May 17, 2026